

Today I have a post for Donna Salazar Designs with a step-by-step tutorial on how to create this funky mini pizza box.
I found the original instructions for this gift box on Splitcoast Stampers.
This month, we are focussing on gifts, Christmas cards and home décor, so when I found the instructions for this gift box I was all over it :)))
I am always on the look out for different kind of gift wrapping/boxes that are not specific for any season.
Anyway, let's get started.
First you need a sheet of double sided paper (or cardstock) of 6 x 11" size.
I chose the Weathered Winter sheet from the same named CHA2010 paperline

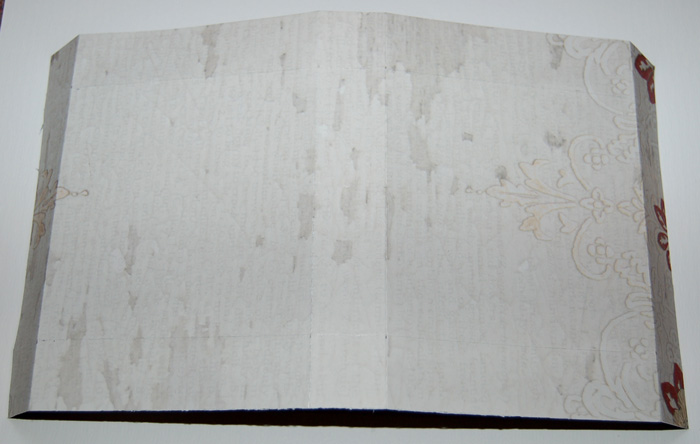
Once cut to size you will need to score the sheet (6" width facing upwards) at 1" and 5" downwards

Then flip the sheet to the side so the 11" width is facing upwards and score at 1", 5", 6" and 10"
Now you will need to cut into the sides for the flaps
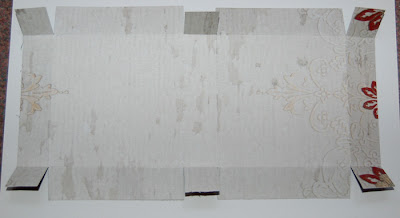
If you want to you can spritz some ink onto the paper before you start adhering the edges together.

Place some double-sided adhesive tape onto the edges of the flaps

The flaps will go inwards and once adhered will create a corner such as this.

And this is how it looks in its more bare stages, before my favourite part - the embellishing - starts.

First I created a border by cutting three strips from the Spring Sky paper using the Creative Book Pages 2 border die.

I added some scrummy bling lines from Want2Scrap to the sides (which also hides - quite cleverly - the part where the border ends meet)

And here is the box in full frontal and half tilted view.


I hope you enjoyed this tutorial
Products used
- Papers: Donna Salazar for GCD Studios - Weathered Winter, Do You See, Butterfly Harmony, Spring Sky, Steampunk Gentleman
- Mists: Donna Salazar for Clearsnap - Smooch Spritz in Green Olive, Pralines and Cream, Sea Breeze
- Inks: Clearsnap Cat's Eye Chalk - Dark Moss, Chestnut Roan, Dark Brown
- Bling: Want2Scrap
- Embossing Powder: Clearsnap Inc
- Corrugated Board: Zutter
- Dies: Donna Salazar for Spellbinders - Wonderful Wings, Creative Bookpages Two,
- Dies: Spellbinders - Grand Labels One,
Pens: Uniball Signo in black
Adhesive: Scrapbook Adhesives, KI Gloo
absolutely gorgeous!!
ReplyDelete//Katarina
absolutely gorgeous!!
ReplyDelete//Katarina
Gorgeous work hun!
ReplyDeleteSuch a beautiful box, Kim! Love this tutorial! I think it's such a great idea to know how to create a basic box shape, as this is useful for so many things all year round. TFS and thanks for the gorgeous inspiration!
ReplyDeletegorgeous!!!
ReplyDelete