**click on image to enlarge **
In addition to various scraps from the Antiquities paper line and some Smooch Spritz you will need the following tools and products to re-create this project:
- Paper trimmer/scissors/craft knife
- Cardstock
- Inks
- Double-sided adhesive tape
- Scoring board
- Medium sized tag
- Circle punches of various sizes
- Journaling pens in black and white
While you wait for the Smooch Spritz to dry (which incidentally is a very quick process), you may want to prepare some paperstrips to create the rosette-flowers.
I decided to make use of the Die-cut Ribbons paper, which will leave you with this fantastic lot of scalloped strips
Get you scoring board/tool out, or alternatively just use a bone folder and a ruler to score along each scallop
Don't worry abut lining it up at numbered intervals, as long as the top and bottom scallop match up, you are good to go. To achieve the accordion fold, flip the strip over after each score, as this will make it so much easier for you later on to fold the rosette.
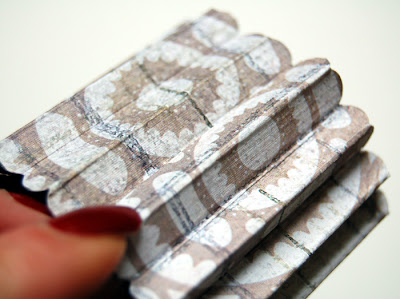
Once you have scored the whole strip, fold it carefully in accordion style, like this
Now you want to join the ends by placing a piece of double-sided adhesive tape to one end
Peel off the backing paper and join the two ends like this
Now you will have a cylindrical shape in front of you, gather the top end and push it gently towards the middle and downwards
Once you have pushed the rosette all the way down, you will find that unless you secure it, it will bounce back up and you are left with the cylindrical shape again. I prepare myself by punching a selection of 1" circles from patterned paper and cardstock, adding a large glue dot to the middle.
Once I have pushed the rosette downwards, I keep it pressed down with one hand, take one of the "glued-up" circles and press this firmly onto the middle section of the rosette
You will also need to secure the back of the rosette in the same way, otherwise it may eventually raise itself upwards again. As the back will not be visible you can use cardstock or paperscraps. The secured back part of the rosette will also double as the area which will be adhered to your project, either with a further glue dot or adhesive foam pads.
While preparing a selection of rosettes for this layout, I noticed that for some reason, the wider 2" paper strips tear apart when you try to push them down, while the 1" strips are fine. It seems that for the larger sized rosettes you will need a longer length than just 12", otherwise your rosette will end up looking like this
I was not going to waste this half-fold and decided to layer two smaller rosettes on top - it worked out well, I think.
I hope you enjoyed this tutorial and that I could inspire you to try your hand at layering papers and rosettes.
- Papers: Donna Salazar for GCD Studios - Die-cut Ribbons - Anitquities, One Sheet Wonderful - Antiquities, Tags, Ribbons and Mosaics - Antiquities, Theater
- Mists: Donna Salazar for Clearsnap - Smooch Spritz in River Mossy, Vanilla Shimmer
- Inks: Clearsnap Cat's Eye Chalk - Chestnut Roan
Stickers: Jillybean, Dymo
Pens - Uniball Signo in white, Zig Millenium in black
Cardstock - Poundland
Tools - Scor-it All, Circle Punches


Amazing tutorial - personally I loved it & cant wait to try out all those techniques! Thanks for sharing!!
ReplyDelete