Showing posts with label stamps. Show all posts

Monday, 13 February 2012

Donna Salazar - February DT - Pt I

Good morning all, this is Kim S. to post for Donna Salazar Designs showcasing a card made with Donna's awesome stamps, produced by Art Gone Wild

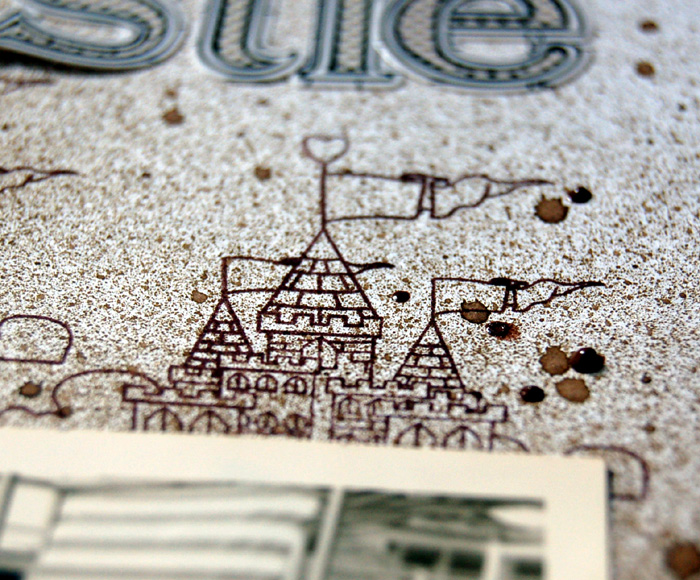
First I prepared the background by spritzing a piece of manilla paper from the new Mixed Media Stax pad with Smooch in Cashmere and Holly Berries.
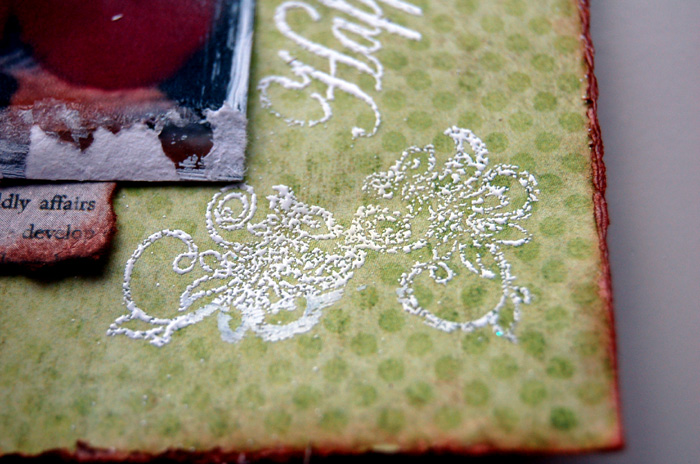
Once it dried I randomly stamped the branch motif in two different colours along one corner and finished it off by embossing two branch motifs in white.

Previously I stamped the Queen Bee motif twice onto a scrap piece of the manilla paper with Mixed Media Inx, hand cut the images and added some glitter to their wings.

With the aid of adhesive foam squares, I raised the bees from the background and added the sentiment using Donna's Alphas and Jenni Bowlin stickers.


Products used

Saturday, 11 February 2012

Gel-a-Tins February DT - Pt II


Sweet Girl- Card


Hello everyone, today I have another CAS card for you and to go with the baby card for a boy from last week, here is one for a sweet baby girl


Making use of the PEACE ON EARTH stamp set I started by stamping a set a baby feet onto the cardbase.


A handcut sentiment was added on top of the feet with some pop dots for dimension and a few pearls added.
As just the stamp and sentiment looked so lost on the card, I added a layered butterfly die to create a balance.


Supplies used:
Cardstock - Papermill
Sentiment - Bella Blvd
Ink - Donna Salazar Mixed Media Inx for Clearsnap
Butterfly Die - Donna Salazar for Spellbinders
Pearls - unknown

Sunday, 5 February 2012

Gel-a-Tins - February DT Pt I


Lately I have been in the mood for very Clean and Simple (CAS) cards, so for February I am going to continue with this technique. Odd thing is that sometimes I find a simplistic card can take you so much longer to finish than a layered embellished card.
Have a guess how long it took me to complete the following card?


Did you guess two hours? Yup, that's right it took me a whoopin' two hours to complete this card, crazy!


Making use of the PEACE ON EARTH stamp set I wanted to create a card to welcome a baby boy into this world.

First I hand cut a tag from plain cardstock and stamped a pair of feet on the bottom

I then added a sentiment, which comes from the FANCY DOILY set, fussy cut around the outline and adhered it to the cloud for dimension.

And there it was - a simple card which took forever to complete :)
But the outcome was so worth it, don't you think?

Supplies used:
Cardstock - Papermill
Paper - Donna Salazar for GCD Studios
Ink - Donna Salazar Mixed Media Inx for Clearsnap
Pearl, Chipboard Cloud - unknown

Sunday, 29 January 2012

Gel-a-Tins DT - January Pt IV


Below post went live on the Gel-a-tins blog earlier:


At the end of January what else could we have on our minds but Love, Love Love? What with Valentine's Day being just around the corner, hearts will be plentiful in the coming weeks. But can you really make use of the CRACKLE PAINT stamps for a lovey-dovey card?


Judge for yourself:


Instructions:
Spray a piece of chipboard with some Smooch Spritz for a glitz look and stamp right onto the now coloured chipboard once the mist has dried. Sprinkle some embossing powder on top and set with a heat gun.


Now ink a chipboard button with some Mixed Media Inx in Chiffon and once dried attach this to the heart with an organza ribbon.


Add a sentiment, which comes from the FANCY DOILY set and stamp with the same colour as used for the embossing and colouring of the chipboard button.


There you go, a simplistic, love-infused card


Supplies used:
Cardstock - Bazzill
Mists - Donna Salazar Smooch Spritz for Clearsnap
Ink - Donna Salazar Mixed Media Inx for Clearsnap
Embossing Powder - Donna Salazar for Clearsnap
Pearls, Ribbon - unknown
Chipboard - Crate

Sunday, 22 January 2012

Gel-a-Tins DT - January Pt III


Below post has gone live earlier on the gel-a-tins blog.


Hello everyone, this is Kim with you again sharing another layout which makes use of the wonderful CRACKLE PAINT stamp.

Instructions:
This time I wanted to achieve a kind of brick look and first stamped onto a kraft tag with Mixed Media Ink - a slow drying ink from Donna Salazar Designs, which actually stays wet long enough so you can add embossing powder!
After I set the embossing powder with a heat gun, I sprayed over the whole tag repeatedly with Smooch Spritz in red berries. Once this tried, I took a baby wipe and wiped over the surface of the tag. The embossed areas will repel the ink and the stamped image will be a crispy white, therefore giving the look of old brickwork.
Supplies used:
Cardstock - Donna Salazar Artistic Papers for GCD Studios
Mists - Donna Salazar Smooch Spritz for Clearsnap
Ink - Donna Salazar Mixed Media Inx for Clearsnap
Journaling Spots - Sassafras Lass, Elle's Studio
Stickers - American Crafts, Dymo
Pearls - Want2Scrap
Other - Embroidery Floss, Blossoms

Sunday, 15 January 2012

Gel-a-Tins DT - January DT Pt II


Below post has gone live earlier on the gel-a-tins blog

Today I would like to share a quick card with you, making use again of my current favourite stamp -  CRACKLE PAINT


Instructions:
Stamp twice directly onto the card base. After I stamped the left hand side first, I rotated the stamp by 180 degrees to ensure that the end of the crackle lines match up as best possible. I LOVE the effect this stamps gives to any background
Cut a strip of patterned paper the length of the card and a width of about 2" and run a border punch along the top and bottom edge. Adhere this to the background.
Add a sentiment, such as this one which comes from the FANCY DOILY set and adhere to the paper strip.

I also love to experiment with embossing powders and I after I sprayed two flowers with some mists, I sprinkled some random embossing powder onto the leaves.

And here is the complete card again
Supplies used:
Cardstock - Bazzill
Papers - My Minds Eye
Mists - Donna Salazar Smooch Spritz for Clearsnap
Ink - Donna Salazar Mixed Media Inx for Clearsnap
Embossing Powder - Donna Salazar for Clearsnap
Pearls - Want2Scrap
Border Punch - Martha Steward
Flowers - unknown

Monday, 9 January 2012

Gel-a-Tins DT - January Pt I

Below post has gone live on the gel-a-tins blog earlier

I love to create crackled backgrounds on my projects but I always found it such a long winded process to first coat the background with some paint, then a layer of crackle medium and afterwards another layer of paint.

Thankfully with the fabulous CRACKLE PAINT stamp, all you need is an inkpad at the ready :)
Instructions:
Stamp anywhere on your background and while the ink is still wet, sprinkle a few bits of embossing powder randomly onto the motif. Once you set the embossing powder with your heat gun, this will make for an interesting two tone/two textured look.
I also made use of the flower stem from the ONCE UPON A TIME set to enhance the cluster of flowers and leaves
And here is the complete layout again - it was a breeze to create it when you don't have to wait for layers of paint and crackle medium to dry.
Supplies used:
Cardstock - Donna Salazar Artistic Papers for GCD Studios
Mists - Donna Salazar Smooch Spritz for Clearsnap
Ink - Donna Salazar Mixed Media Inx for Clearsnap
Journaling Spots - Sassafras Lass, Elle's Studio
Stickers - American Crafts, Dymo
Pearls - Want2Scrap
Other - Embroidery Floss, Blossoms

Monday, 26 December 2011

Gel-a-Tins - December DT, Pt IV

Below post went live on the Gel-a-tins blog earlier

I don't know about you, but I am terribly behind with the scrapping of my older Christmas pictures. The other day I came cross one, which showed me and my baby brother on his first Christmas - way bank in 1972.
Yup, I think I desperately need to catch up somehow!

What better way, to make use of the stamp set HAPPY HOLIDAYS to incorporate in the overall design of the page.

Instructions:
Using a Versmark inkpad, I stamped the sentiment "Happy Holidays" and the wee "Floral" on the side of my layout. Then I sprinkled some white embossing powder over the area and tapped the excess power back into the pot. Using my heat gun, the sentiment and image quickly set.
I actually like the effect when the embossed are is not perfectly covered with the powder - it gives a more vintage-distressed look, don't you think?
Supplies used:
Papers - Mt Minds Eye, Simple Stories
Inks - Clearsnap
Other - Embossing Powder, Dimensional Paints
Stickers - Jenni Bowlin

Sunday, 18 December 2011

Gel-a-Tins - December DT, Pt III

Below post went live earlier on the Gel-a-tins blog

So, are you all organised for the holidays or could you do with a little more inspiration for quick last minute card? Good, because I have one more for you making use of the new stamp set HAPPY HOLIDAYS

Instructions:
First I inked the edges of some paper scraps and layered them on top of each other. Stamping the "Wreath" onto some white cardstock, I coloured the image with various shades of green and added a little clear glitter glue to some areas, for a frosted look.
The sentiment "Happy Holidays" was stamped onto a strip of masking tape and added to the top of the card.For the final touch, I used a border punch to avoid too much white space at the top and added a few drops of clear dimensional paint.

Supplies used:
Cardstock - Mad About Cards
Papers - Authentique
Inks - Stampin' Up, Clearsnap
Other - Glitter Glue, Dimensional Paints
Tools - Martha Stewart border punch


Sunday, 11 December 2011

Gel-a-Tins - December DT, Pt II

Below post went live on the Gel-a-tins blog earlier

Today I would like to showcase another Christmas card with you, which was created within the matter of about 10 minutes. I can sometimes spent hours on getting just one card finished but the gorgeous new stamp set HAPPY HOLIDAYS makes creating cards a doddle!
Instructions:
I started stamping the tag with the "Merry Christmas" sentiment first and then added the little "Swirl" to the corners of the tag. Previously I stamped the "Holly" twice to a sheet of white bleedproof paper, coloured it in and hand cut the image, adhering it to the tag with the aid of some foam dots.
To add a little more interest to the "Swirl", I adhered a red flat backed pearl to the lower part to compliment the berries from the "Holly" image.

Finally I added the tag to my cardbase with a double helping of adhesive foam pads, to raise it off the red background and allow me to tuck some punchinella behind the tag.

Supplies used:
Cardstock - Mad About Cards
Papers - Donna Salazar Designs
Tag- WH Smith
Inks - Stampin' Up
Other - Bakers Twine, Punchinella, Button


Sunday, 4 December 2011

Gel-a-Tins - December DT, Pt I

Below post went live on the Gel-a-tins blog earlier


I don't know about you all, but I am SOOOOO ready for Christmas and the fabulous new stamp set HAPPY HOLIDAYS had me super excited to get started on my Christmas cards!

The detail of the wreath is the best I have even come across and looks awesome just left as it is or coloured in. For today's card I have chosen to get out my ProMarker pens and colour away...
Instructions:
First I stamped the image onto some bleedproof white paper and then added various shades of green all across the wreath, adding a few bits of red for the berries. I hand cut the wreath from the paper and added it to the background with some adhesive foam dots.

I also wanted to feature the totally cute little bow, and after it was stamped and coloured it, I hand cut the bow and added it to the bottom part of the wreath. As a final touch, a piece of bling was added to the bow
Supplies used:
Cardstock - Mad About Cards
Papers - Bo Bunny, Authentique
Punch - Woodware
Inks - Stampin' Up
Pens - ProMarkers


Sunday, 20 November 2011

Gel-a-Tins - November DT, Pt II

The below post went live on the Gel-A-Tins Blog earlier:

I had lots of fun this month creating my own background with the "Fairy Castle" stamp of the brand new ONCE UPON A TIME set to create this layout, showing yours truly digging away at the beach to create my very own sandcastle.
First I used a generous helping of walnut spray and spritzed it randomly over an 8.5 x 11 sheet of white cardstock. While the spray was still wet I sprinkled a few pieces of white embossing powder over it and set my heatgun to work. I love the effect the white embossed areas give to the overall look of the page.

I then decided where I wanted to place the photograph and stamped the image around the area in a slightly offset fashion.

All I needed to add now, were stickers and tags to add my journaling and the title.

Supplies used:
Cardstock - Poundland
Inks - Stampin' Up
Stickers - Jenni Bowlin, Making Memories
Tags/Journaling spost - Bella Blvd, My Minds Eye


Monday, 14 November 2011

Gel-a-Tins - November DT, Pt I

The below post went live on the Gel-a-Tins blog earlier.

If, like me, you do not have children you may wonder sometimes on how to make use of specific stamp sets that are geared towards kids' pages or cards.

During November I hope to show you that cute sets like the brand new ONCE UPON A TIME can be used in so many ways and are certainly not restrictive at all.
As soon as I saw the set I was taken by the gorgeous flower stem and knew immediately that I wanted this to become an important feature of my layout. I just LOVE fussy cutting images and the flower stem is perfect to be turned into an embellishment.
I tucked each of the hand cut stems underneath the papers edge and adhered them to the background with the aid of some adhesive dots, to get some dimension by raising the images.
As you have probably noticed, I love to layer papers and embellishments on my layouts and thought that adding the sentiment "One Upon a Time" from the set, would look really cute tucked underneath one of the background papers.
Supplies used:
Papers - Authentique
Stickers - American Crafts, Jenni Bowlin
Vellum Butterflies - Jenni Bowlin
Inks - Stampin' Up
Other - Gesso, Punchinella, Walnut Spray


Wednesday, 26 May 2010

Whoaaaaaa

Geez - I can't believe just how much mojo-overflow I have at the moment, cranking out layouts and cards left, right and center. So, prepare yourself for a picture heavy post :)

First off here are a few layouts I created just because - just free-flowin' chuckin' it all on :)

I also finally made use of many of the deco tapes I bought off Etsy {{ here }} and {{ here }}. They have been screaming at me to be used for ages!

** click on any of the following images to enlarge **
Ingredients:
Papers: Upsy Daisy Designs - #BLO011. Awakening, #SYLA013. Everglades #UDD0158. Love; Scribble Scrabble * Stickers: Making Memories, Jenni Bowlin * Pearls: Papercellar* Border Punch: Stampin' Up *
Ingredients:
Papers: 3ndypapir; Daisy D; My Minds Eye * Stickers: Dymo; Making Memories; Rusty Pickle * Buttons: Rusty Pickle * Pearls: other * Paint: Jones Tones

Ingredients:
Papers: My Minds Eye * Stickers: Rusty Pickle; Making Memories; Dymo * Pearls: Papercellar * Stamps: Catslife Press; Hero Arts * 

And then there are some cards, which were created for a few fun challenges, across the net.

The recent challenge at {{ Allsorts }} is asking for the use of tags/tickets on your card, for which I dug deep into my old Rusty Pickle stash box for some vintage tags. I used the {{ Yummy Cupcake }} stamp from {{ Some Odd Girl }} and a selection of my ProMarkers.


Mrs {{ ODDity }} pointed out a fun challenge for me straight from the {{ cards }} blog, who were looking for creations with punny sentiments...Now THAT is something I don't need to be asked for twice.
Enter my feathered friend {{ Birdie Hatch }} another stamp from SOG and more ProMarker action :)

This card also qualifies for the recent sketch (I flipped it 90° to the left) over at {{ 2 Sketches 4 You }}, who are celebrating their 2nd birthday this week - and there is no doubt that {{ Kazan }}, {{ Laura }} and their DT are an EGGcellent inspiration week in, week out ! HAPPY ANNIVERSARY my lovelies :)


Phew...I guess that's it for the moment. But I am sure I will have more to post soon.